General API info
You can add basics such as the title, introductory text, base URL and authentication information in your scribe.php config file.
Title
To set the HTML <title> for the generated docs, use the title key. This title will also be used in the Postman collection and OpenAPI spec.
'title' => 'The SideProject API',
If you leave title empty, Scribe will infer it from the value of config('app.name').
Description and introductory text
You can add a description of your API using the description key. This description will be displayed in the docs' "Introduction" section, and in the Postman collection and OpenAPI spec.
The intro_text key is where you'll set the text shown in the "Introduction" section of your docs (after the description).
You can also edit the .scribe/intro.md file that is added to your app after running scribe:generate.
Markdown and HTML are also supported (see HTML helpers)
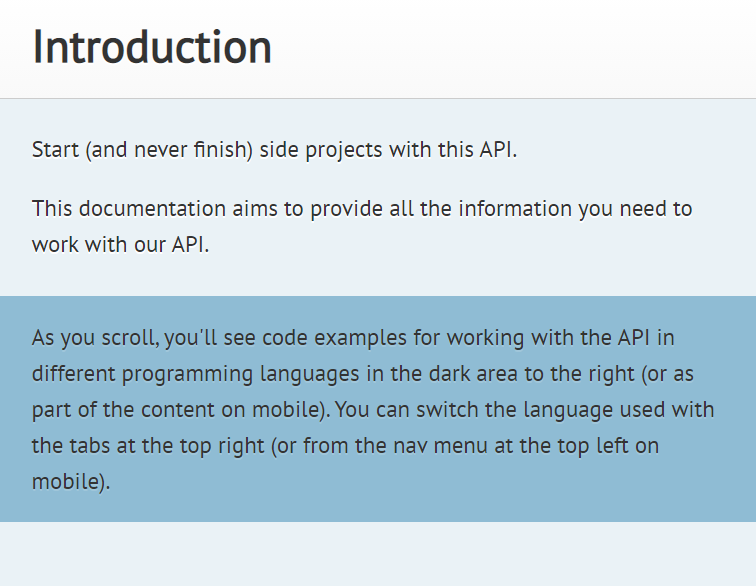
  'description' => 'Start (and never finish) side projects with this API.',
  'intro_text' => <<<INTRO
This documentation will provide all the information you need to work with our API.

<aside>
As you scroll, you'll see code examples for working with the API in different programming languages in the dark area to the right (or as part of the content on mobile).
You can switch the language used with the tabs at the top right (or from the nav menu at the top left on mobile).
</aside>
INTRO
Base URL
By default, Scribe will use the current app URL (config('app.url)) as the base URL in your docs (also known as the display URL). However, you can customise this with the base_url key. For example, setting the base_url to this:
'base_url' => 'http://sideprojects.knuckles.wtf',
...means that http://sideprojects.knuckles.wtf will be shown in the generated docs, even if you ran the generate command on localhost or in CI.
You can also set the URL used in the API tester (Try It Out) with the try_it_out.base_url key.
Logo
Maybe you've got a pretty logo for your API or company, and you'd like to display that on your documentation page. No worries! To add a logo, set the logo key in scribe.php to the path of the logo. Here are your options:
-
To point to an image on an external public URL, set
logoto that URL.'logo' => 'http://your-company/logo.png', -
To point to an image in your codebase:
- if you're using
laraveltype docs, setlogoto thepublic_path()of the image - if you're using
statictype, pass in the path to the image relative to thepublic/docsdirectory.
For example, if your logo is in
public/images:// static type
'logo' => '../img/logo.png',
// laravel type
'logo' => 'img/logo.png', - if you're using
-
If you don't want a logo, set
logotofalse.
Authentication
You can add authentication information for your API using the auth section in scribe.php.
You can also edit the .scribe/auth.md file that is added to your app after running scribe:generate.
Scribe uses the auth information you specify for four things:
- Generating an "Authentication" section in your docs
- Adding auth information to the Postman collection and OpenAPI spec
- Adding authentication parameters to your example requests for endpoints that use authentication
- Adding the necessary auth parameters with the specified value to response calls for endpoints that use authentication
Here's how you'd configure auth with a query parameter named apiKey:
return [
  // ...
  'auth' => [
    'enabled' => true,
    'default' => false,
    'in' => 'query',
    'name' => 'apiKey',
    'use_value' => env('SCRIBE_API_KEY'),
    'placeholder' => 'YOUR-API-KEY',
    'extra_info' => 'You can retrieve your key by going to settings and clicking <b>Generate API key</b>.',
  ],
];
If apiKey were to be a body parameter, the config would be same. Just set in to 'body'.
Here's an example with a bearer token (also applies to basic auth, if you change in to 'basic'):
return [
  // ...
  'auth' => [
    'enabled' => true,
    'default' => false,
    'in' => 'bearer',
    'name' => 'hahaha', // <--- This value is ignored for bearer and basic auth
    'use_value' => env('SCRIBE_AUTH_KEY'),
    'placeholder' => '{ACCESS_TOKEN}',
    'extra_info' => 'You can retrieve your token by visiting your dashboard and clicking <b>Generate API token</b>.',
  ],
];
And here's an example with a custom header:
return [
  // ...
  'auth' => [
    'enabled' => true,
    'default' => false,
    'in' => 'header',
    'name' => 'Api-Key', // <--- The name of the header
    'use_value' => env('SCRIBE_AUTH_KEY'),
    'placeholder' => 'YOUR-API-KEY',
    'extra_info' => 'You can retrieve your token by visiting your dashboard and clicking <b>Generate API token</b>.',
  ],
];
The default field is the default behaviour of our API. If your endpoints are authenticated by default, set this to true, then use @unauthenticated on the method doc block if you need to turn off auth for specific endpoints. If your endpoints are open by default, leave this as false, then use @authenticated on the method doc block if you need to turn on auth for specific endpoints.
You can set whatever you want as the extra_info. A good idea would be to tell your users where to get their auth key.
The use_value field is only used by Scribe for response calls. It won't be included in the generated output or examples. If you need to customize this value dynamically, you can use the beforeResponseCall() method.
The placeholder is the opposite of use_value. It will be used only as a placeholder in the generated example requests.
For more information, see the reference documentation on the auth section.